Shadowfix
3/3 left today Sign in Upgrade
Free online tool No signup v2.4

Remove
Shadow
from Photo

Erase harsh shadows from faces, backgrounds and product shots. Free, no signup, unlimited.

00 — Shadow remover JPG · PNG · WEBP — max 10 MB
No photo handy?

Ready. Drop a file or pick a sample — the result lands in the compare view below.

  • No signup
  • No watermark
  • Photos deleted after processing
01

Before / After

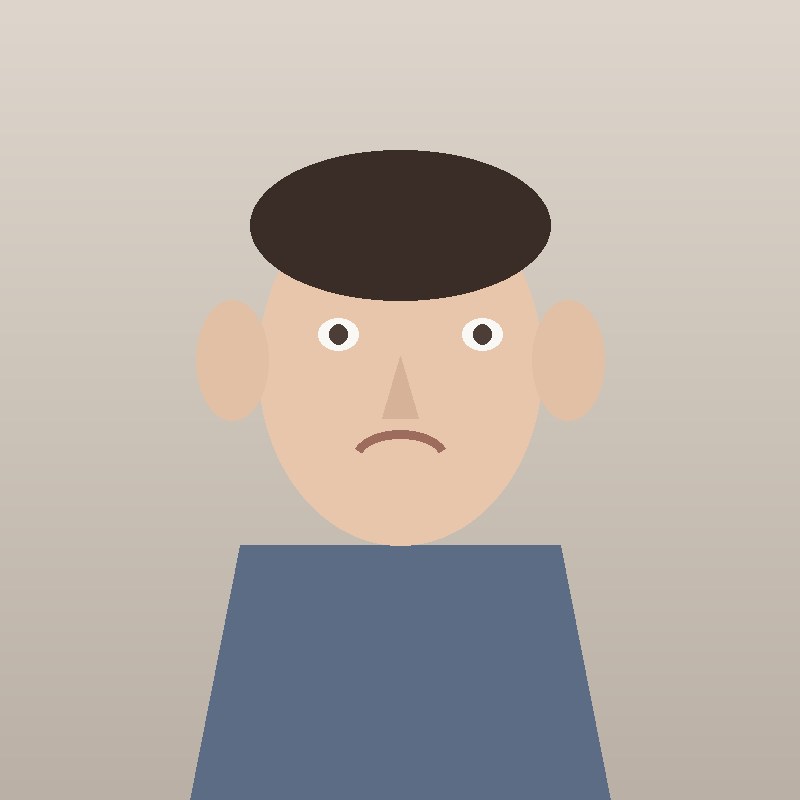
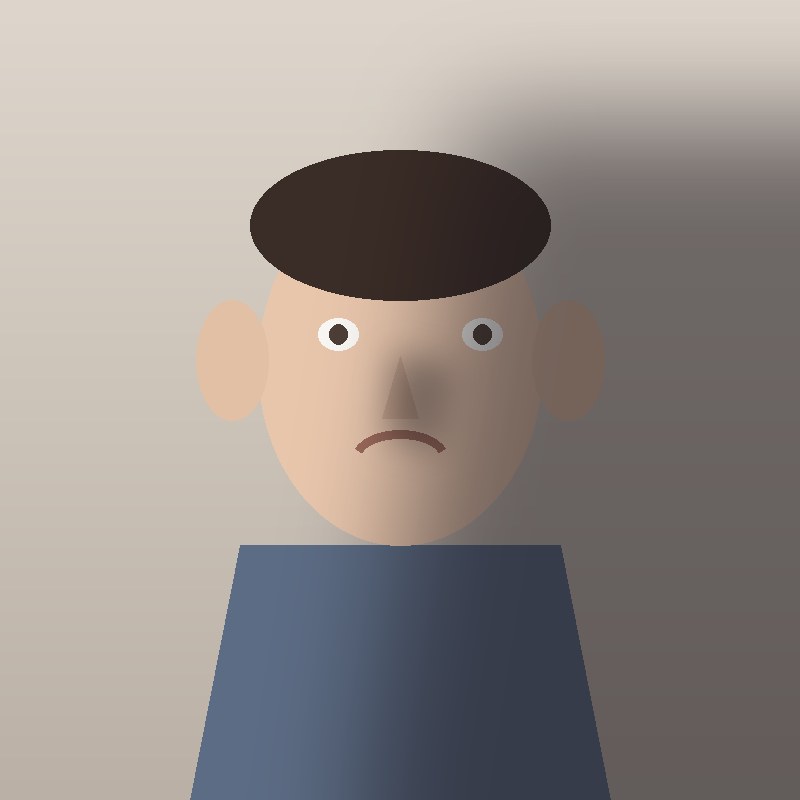
Same file, same pixels, one pass. Drag the yellow rule to see what the shadow was hiding.

Portrait before shadow removal: a hard shadow covers the right side of the face Before After ← Drag to compare →
What changed
The cast shadow across the cheek and background is flattened. Skin texture, catchlights and the background gradient stay put — nothing is repainted.
What we never touch
Contact shadows under the chin and the nose stay, or the face reads as a cut-out sticker. Removing them is what makes free tools look fake.
Output
Full-resolution JPG or PNG, no watermark, EXIF orientation preserved.
Try it on your photo
02

Four scenes,
four kinds of shadow

Each preset is tuned for a different failure mode. Left frame is the original, right frame is the output.

Portrait before: hard window light throws a shadow across half the face
Before
Portrait after: the face is evenly lit, skin texture intact
After

A Portraits

Window light and ring lights leave a hard edge down one cheek. The pass evens the falloff and keeps the nose and chin shadows that give a face depth.
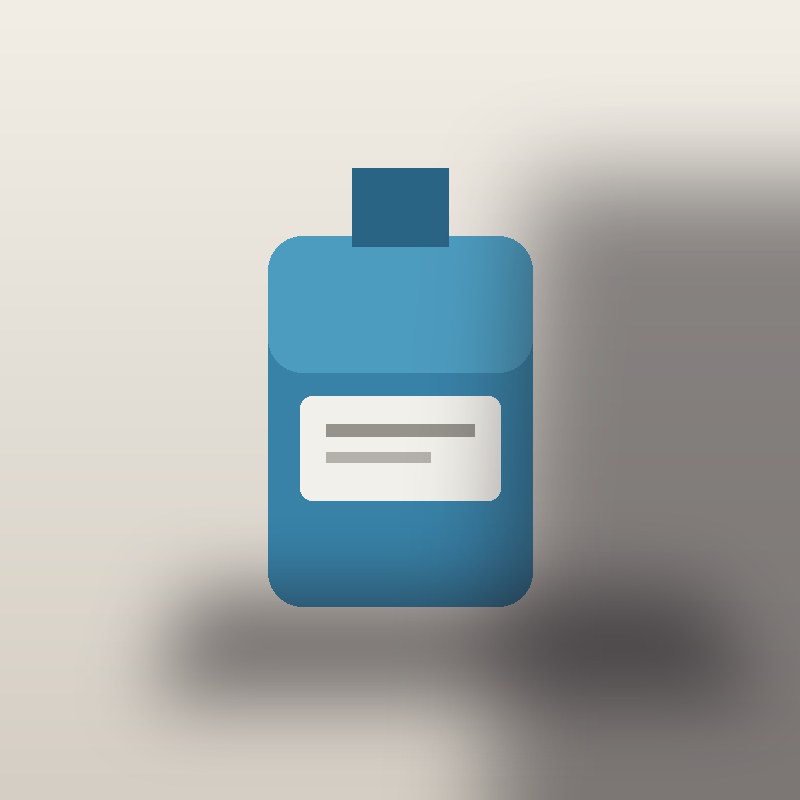
Product shot before: a dark cast shadow spills across the tabletop
Before
Product shot after: clean, even backdrop ready for a marketplace listing
After

B Product shots

Marketplace listings get rejected for grey, uneven backdrops. Product mode flattens the sweep behind the object without eating its edges.
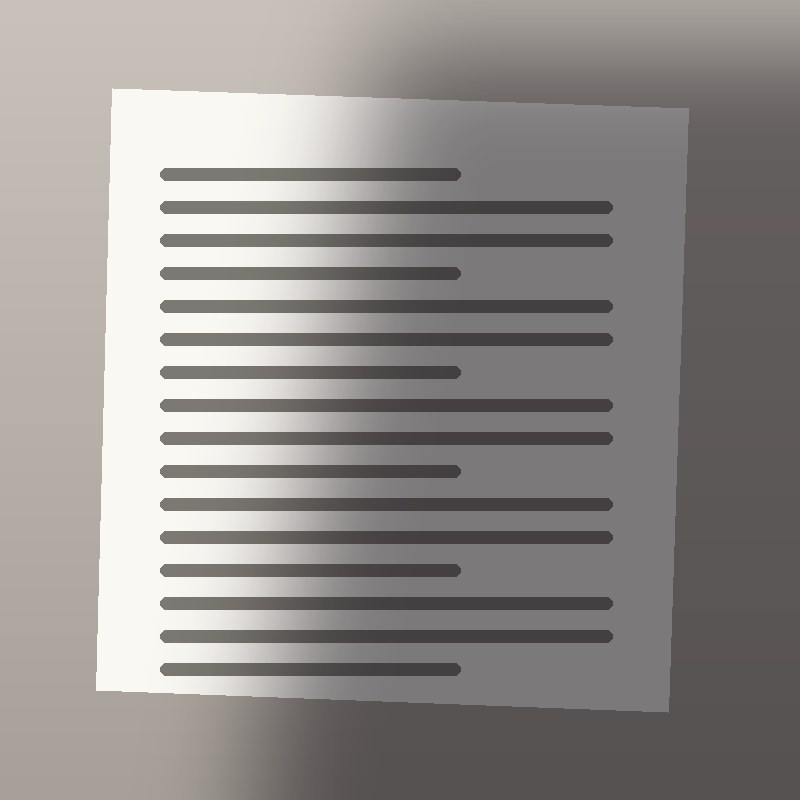
Document before: the photographer's hand casts a shadow across the page
Before
Document after: the page is uniformly white and the text is legible
After

C Documents

Phone scans carry your own shadow across the page. Document mode rebuilds the paper white so OCR and printers stop choking on it.

Passport photo before: a shadow behind the head on the backdrop
Before
Passport photo after: plain even backdrop, no shadow behind the head
After

D Passport photos

A shadow on the backdrop is the most common ID rejection there is. Passport mode clears the wall behind the head and holds the background neutral.

03

How it works

Three steps, about four seconds. Nothing to install, no account, no queue for the first three photos of the day.

  1. 01

    Drop the photo

    Drag a JPG, PNG or WEBP into the panel, or paste from the clipboard. Files up to 10 MB.

    → Nothing uploads until you drop it

  2. 02

    Pick the scene

    Smart reads the photo and chooses for you. Override it with Portrait, Product, Document or Passport when you already know what you shot.

    → 05 presets, one click

  3. 03

    Check, then download

    Compare with the slider before you commit. Download at full resolution, with no watermark. The original is deleted from the server within the hour.

    → Avg. 3.1 s per photo

Before you shootFewer shadows in camera = better result
Turn away from the window

Side light from a single window is what carves a hard shadow down one cheek. Face it instead of standing beside it.

Step away from the wall

A metre of gap between you and the backdrop is enough to drop the head shadow behind you — the top reason ID photos get rejected.

Kill the direct flash

On-camera flash flattens the face and throws a hard outline. Bounce it, or shoot in open shade instead.

Shoot flat objects from above

Photographing a page at an angle puts your own arm in the frame. Hold the phone parallel to the paper.

04

Who keeps
coming back

Four jobs where a shadow costs money — a rejected listing, a rejected passport, an unreadable receipt.

E-commerce listings

Amazon and Etsy want a clean, even background. Clear the sweep shadow instead of reshooting the whole batch.

Preset 03 — Product

Passport & ID photos

A shadow on the wall behind you is the top reason applications bounce. Fix it at home before you pay for a print.

Preset 05 — Passport

Real estate & interiors

Rooms shot at noon come out half-dark. Lift the shadow band across the floor without blowing out the window.

Preset 01 — Smart

Scans & receipts

Phone-photographed contracts, invoices and homework, flattened to clean paper white so the text is actually readable.

Preset 04 — Document

A shadow is rarely just cosmetic — in each of these it costs a re-shoot, a re-application or a lost sale.

  • remove shadow from product photo
  • remove shadow from passport photo
  • remove shadow from face
  • remove shadow from document scan
  • remove shadow from wall behind head
  • remove shadow from real estate photo
06

This vs Photoshop
vs your phone

Search “how to remove shadows in Photoshop” and you mostly get hour-long dodge-and-burn tutorials. Your phone’s eraser has its own ceiling. If you just want the shadow gone, this table should help you pick a lane — including the cases where you should not use us.

Approach Best for What it costs you
ShadowFix Fastestthis site Portraits, product shots, documents and ID photos — anywhere you want the shadow gone and everything else left alone. Upload, pick a mode, download. Roughly 10–30 seconds a photo, no retouching skill needed. Three free a day.
PhotoshopDodge & Burn, Generative Fill Retouchers who need pixel-level control over every edge, and who are already fluent in masks and curves. Selections, masks, matching the colour back — often 20–60 minutes a photo, on top of a subscription. Genuinely better if you know what you are doing.
LightroomShadows slider Global exposure fixes — when the whole frame is underexposed rather than one area being in shadow. Fast, but lifting globally flattens contrast and turns the picture grey. A hard cast shadow does not come back this way.
Phone AI erasersGalaxy AI, iPhone Clean Up Wiping one small object or a thin shadow out of a shot you just took, without leaving the camera roll. Free and instant, but it erases rather than relights — a large shadow leaves smearing. Availability depends on your handset and OS version.
Photo editing appsgeneric “shadow remover” When the shadow is already faint and you only need to nudge the brightness a little. Most of them only lift the dark pixels — the shadow edge stays visible, and the export usually costs you a quality step.

Short version: if you need one shadow gone and you are not a retoucher, start here. If the shot matters enough to warrant an hour of masking, Photoshop still wins on control.

07

What kind of
shadow is it?

Not every dark patch is the same problem. Knowing which one you are looking at tells you whether a slider will fix it — or whether the area has to be rebuilt.

Type 01

Cast shadow

A hard-edged shape thrown onto a wall, table or backdrop by something outside the frame — you, a lamp, a window frame. The edge is sharp and the shape is recognisable.

Slider fix? No. Lifting exposure just makes a grey patch with the same outline.

Type 02

Harsh face shadow

Light from one side carving a dark half down the nose, under the chin or across one cheek. Common with a single window, midday sun or a hat brim.

Slider fix? Partly — but you lose skin texture and the face goes flat before the shadow leaves.

Type 03

Background shadow

An uneven backdrop: darker on one side, or a halo behind the head from standing too close to the wall. The subject is fine, the wall is not.

Slider fix? No. A global lift brightens the subject too, and the gradient stays.

Type 04

Document shading

A page photographed by hand: one corner in shade, a soft gradient across the paper, sometimes the outline of your own arm over the text.

Slider fix? Rarely. Push it far enough to clear the shade and the text starts blowing out.

08

Where the
shadow came from

Four things cause almost every unwanted shadow in a phone photo. Two of them you can avoid next time; two of them you usually cannot.

01

Direct sun

Midday sun is a small, hard light source directly overhead. It carves shadows under the brow, nose and chin, and it does it fast — a cloud passing overhead changes the whole frame.

Avoidable — move into open shade
02

You, standing in the light

Photographing a document, a flat-lay or a product from above puts your own body between the lamp and the subject. Your outline lands right in the frame.

Avoidable — shoot from the side of the light
03

One ceiling light, one window

Most rooms are lit by a single source. Anything lit from one side has a dark side, and standing near a wall puts a second shadow behind you.

Hard to avoid indoors
04

The phone itself

Holding a phone close over a page blocks the light with the handset and your hand. On-camera flash does the opposite — it flattens the face and throws a hard outline behind it.

Hard to avoid handheld
09

When a shadow
gets you rejected

In some places a shadow is not a matter of taste — it fails a rule, and the submission bounces back.

Passport & visa photos

Most authorities require a plain background, evenly lit, with no shadow across the face and none behind the head. Standing too close to the wall is the single most common cause of a rejected application.

Fix a passport photo

Marketplace listings

Amazon and several marketplaces expect a clean white background on the main image. A sweep shadow at the base of the product reads as a dirty background and can hold up the listing.

Clean a product shot

Scanned paperwork

Uploaded contracts, IDs and forms get read by a person or by OCR. A shadow across the page lowers contrast exactly where the text is, and the upload comes back as unreadable.

Flatten a document
05

Why you can
trust this

Four claims. Every one of them you can check yourself, right now.

01 — Offline proof

Two tools never upload anything

Tint and Red-eye run entirely inside your browser. Switch off your wi-fi, reload the page and use them again — they still work. Nothing ever reaches a server, so there is nothing for us to keep.

02 — Deleted on completion

AI tools discard the file immediately

Shadow, glare and passport need a server to run. The image is processed in memory and dropped the moment the result comes back. Not written to disk, not used for training, not shared.

03 — Why some are free

Browser tools cost us nothing, so they are unlimited

The AI tools cost real money per image, which is why they are capped at 3 a day, or 10 once you sign in. We would rather tell you the actual reason than pretend the limit is a feature.

04 — No quiet downgrades

Free output is the full output

No watermark, no reduced resolution, no locked download button at the end. What the free tier produces is the same file a paid plan produces — you just get fewer of them per day.

  • 6 free tools
  • 2 run fully offline
  • No account to start
  • No watermark, ever
06

Pricing

The free tier is the product, not a trial. Pay only when you need volume, batches or full resolution.

Free

$0 / forever

  • 3 photos a day
  • Export up to 1600 px
  • No watermark, no signup
  • All 05 scene presets
Start now

Starter Most picked

$4.90 / month

  • 150 photos a month
  • Export up to 4000 px
  • Batch of 10 at a time
  • Priority queue
Get Starter

Pro

$19.90 / month

  • 1000 photos a month
  • Full resolution export
  • Batch of 100 + API access
  • Commercial licence
Get Pro

Cancel any time · Full plan comparison → shadowfix.pages.dev/pricing

07

Questions

Everything people ask before they upload the first file.

Q.01 How do I remove a shadow from a photo?
Upload the photo, pick the mode that matches what you shot (portrait, product, document or passport), and download the result. It takes about 10 to 30 seconds and needs no editing skill. Three photos a day are free without an account.
Q.02 Can AI actually remove shadows, or does it just brighten them?
Brightening only lifts the dark pixels, which leaves a grey patch with the same outline. The AI here rebuilds the lighting in the shadowed area so the texture and colour underneath match the rest of the photo — that is why a hard cast shadow disappears instead of turning grey.
Q.03 Can it remove a shadow from a face without making the skin look plastic?
That is what the Portrait mode is for. It relights the shadowed side while keeping pores, hair detail and skin texture. It does not smooth skin or alter facial features.
Q.04 How do I get rid of my own shadow in a photo of a document?
Use Document mode. It flattens the lighting across the page so the paper reads as an even white and the text stays sharp, including the area where your arm or phone blocked the light.
Q.05 Can I remove a shadow from a passport or ID photo?
Yes, and it is one of the most common uses. Removing a shadow is a lighting correction, which is normally accepted — unlike changing facial features, which is not. A shadow behind the head or across the face is the top reason applications get rejected.
Q.06 Is there a shadow remover app for iPhone or Android?
You do not need one. This runs in the phone browser — open the page, tap the upload area and pick a photo from your camera roll. Nothing to install.
Q.07 Is it really free, and what is the catch?
The browser-based tools, tint and red-eye, are unlimited forever because they cost us nothing to run — they never leave your device. The AI tools cost real money per image, so they are capped at 3 a day, or 10 once you sign in free. No watermark and no reduced resolution on any tier.
Q.08 Will removing the shadow change the rest of my photo?
No. The model is instructed to leave composition, colour and texture alone and only rebuild the lighting where the shadow was. If you compare with the slider you should see everything outside the shadow unchanged.
Q.09 Do you keep my photos?
No. Files are processed in memory and discarded immediately — not written to disk, not used for training. The tint and red-eye tools never upload anything at all; you can turn off your wi-fi and they still work.
Q.10 I photographed an old printed photo and my own shadow is on it. Can this fix that?
Usually yes. That is a cast shadow over a flat surface, which is the easiest case. Use Document mode rather than Portrait, even though the picture is of a person — the mode describes what you photographed, not what is in the image.
Q.11 Why not just use the Shadows slider in Lightroom?
The Shadows slider is a global adjustment. It lifts every dark pixel in the frame, which flattens contrast and turns the picture grey long before a hard shadow disappears. It works well when the whole photo is underexposed, not when one area is in shadow.
Q.12 What file types and sizes work?
JPG, PNG and WebP, up to 10 MB. Use the original file rather than a screenshot or a re-saved copy — there is more detail left in the shadow for the model to work with.